Quantcast
Channel: Ashish Awasthi's Blog
Viewing all 165 articles
Browse latest View live

Jdeveloper installation folder size increasing beyond limit , Reason was hprof (Heap Profiling) files

$
0
0
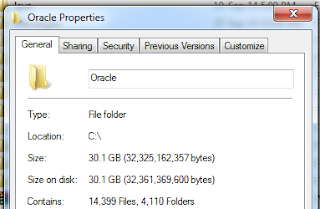
Recently i faced a problem, i was lacking space on my C drive so  checked all directories and found that the size of Jdeveloper 12.1.3 installation folder Oracle-->Middleware  was approx 30 GB . This is not expected as Jdev. takes approx 1.5 to 2 GB space only


Then i found some java_pidXXXX.hprof file that was taking lot of space in this folder


From Docs-
What is HProf ?
HProf is a tool built into JDK for profiling the CPU and heap usage within a JVM. A Java process crash may produce an hprof file containing a heap dump of the process at the time of the failure. This is typically seen in scenarios with "java.lang.OutOfMemoryError" 


So for the time i have deleted all these files as i don't need (typically used for memory leaks analysis), these files were created due to jdeveloper  outOfMemory warning.
So final resolution is to solve outOfMemory problem of Jdeveloper -Fixing java.lang.OutOfMemory Java Heap Space error in JDeveloper

To avoid creation of these files next time do a change in jdev.config file in C:\Oracle\Middleware\Oracle_Home\jdeveloper\jdev\bin  path
In jdev.config Search for Automatically dump heap on OutOfMemoryError , this section tells about heap dump on out of memory-

From jdev.config file -
The heap dump is in HPROF binary format, and so it can be analyzed using
# any tools that can import this format. Examples are jhat, NetBeans and YourKit.
# By default the heap dump is created in a file called java_pid<pid>.hprof in the
# working directory of the VM.


to stop creating dump file comment this line in jdev.config - AddVMOption  -XX:+HeapDumpOnOutOfMemoryError

Cheers:) Happy Learning

References-
http://docwiki.cisco.com/wiki/Java_HProf_Files 
https://community.oracle.com/thread/2512411 
http://kb.vmware.com/selfservice/microsites/search.do?language=en_US&cmd=displayKC&externalId=0000669 

ADF Basics: Call PL/SQL Stored function in ADF Application

$
0
0

This post is about calling stored function in ADF Application , a very basic requirement. Many times we need to call a PL/SQL function in ADF app for any specific requirement.
In this post i am discussing same so for that i have created a PL/SQL function that takes EmployeeId as input parameter and return it's Employees Name (Using Oracle HR Schema)


CREATEORREPLACEFUNCTION FN_GET_EMPNAME(EMP_NO NUMBER)
RETURN VARCHAR2 IS
EMP_NAME VARCHAR2(50) :='N';
BEGIN
SELECT FIRST_NAME||''||LAST_NAME into EMP_NAME
FROM EMPLOYEES WHERE EMPLOYEE_ID=EMP_NO;

RETURN EMP_NAME;
END;

I have a ready to use helper method to call PL/SQL function, Check it


importjava.sql.CallableStatement;
importjava.sql.SQLException;

importjava.sql.Types;

importoracle.jbo.JboException;


/**Method to call Database function
* @param sqlReturnType (Return type of Function)
* @param stmt (Function Name with Parameters)
* @param bindVars (Parameter's Value)
* @return
*/
protected Object callStoredFunction(int sqlReturnType, String stmt, Object[] bindVars){
CallableStatement cst =null;
try{
//Creating sql statement
cst =this.getDBTransaction().createCallableStatement("begin ? := "+ stmt +";end;",0);
//Register dataType for return value
cst.registerOutParameter(1, sqlReturnType);
//Pass input parameters value
if(bindVars !=null){
for(int z =0; z &lt; bindVars.length; z++){
cst.setObject(z +2, bindVars[z]);
}
}
cst.executeUpdate();
//Finally get returned value
return cst.getObject(1);
}catch(SQLException e){
thrownewJboException(e.getMessage());
}finally{
if(cst !=null){
try{
cst.close();
}catch(SQLException e){
e.printStackTrace();
}
}
}
}

It's simple, now see how to use this helper method to call PL/SQL function , Created a method in Application Module Impl class


/**Method to call stored PL/SQl function to get Employee Name
* @param empId
* @return
*/
public String getEmployeeName(Integer empId){
String empNm ="No Employee found";
Object empName = callStoredFunction(Types.VARCHAR,"FN_GET_EMPNAME(?)",new Object[]{ empId });
if(empName !=null){
empNm = empName.toString();
}
return empNm;
}

To Check this method in AM Tester, add method to client interface


Right click on ApplicationModule and choose Run


Put any employee id and click on execute to see result


All done :) , To call this method from  managed bean you can add methodAction to page bindings and then call using Operation Binding
For more detail check - ADF Basics: How to invoke model layer methods from managed bean (Best Practice to write business logic in ADF) 

Cheers:) Happy Learning

Using popupFetchListener to execute method on popup launch in Oracle ADF

$
0
0
Everyone must have used ADF Faces popup component , this is one of most used container to show information on top of page
In this post i am talking about popup fetch event suppose we have to perform some operation before opening popup like filtering data inside popup . We can do this by capturing popup fetch event, if you have checked af:popUp documentation then you must have seen concept of popupFetchListener

From Docs-
The PopupFetchEvent is one of two server-side popup events but doesn't have a corresponding client event. The popup fetch event is invoked during content delivery. This means that the event will only queue for popups that have a contentDelivery type of lazy or lazyUncached. Another caveat is that the event will only work when the launch id is set. This is automatically handled by the af:showPopupBehavior but must be provided as a popup hint if programmatically shown.

So here we will see -

How to use popupFetchListener to filter data inside popup ?
How to execute some operation before opening popup ?
How to call AMImpl method before launching popup?


Let's see implementation part-
  • Create a Fusion Web Application and prepare model using Departments table of HR Schema

  • Fusion Web Application Structure

  • Create a ViewCriteria in Departments ViewObject (For filtering viewObject using DepartmentId) and apply this viewCritria at Application Module level

  • ViewCriteria to filter VewObject

    To Apply ViewCriteria at AM level- Open ApplicationModule--> Select ViewObject Instance--> Click on edit button at top right side


    In new window, Select viewCriteria and shuttle it to selected side. All done :)


  • Create a page, drop a button and a popup with dialog in it, Drop Departments ViewObject in dialog as ADF Form

  • Drop Departments ViewObject as ADF Form in Popup Dialog

  • Set content delivery of popup to lazyUncached and create a popupFetchListener in managed bean

  • Create popupFetchListener method in managed bean

  • I have added an inputText on page to allow user input for DepartmentId
    Create a method in ApplicationModule Impl class that sets value of DepartmentId bind variable and filters Departments ViewObject

  • Code in AMImpl-
    /**Method to set bind variable value in Department ViewObject
    * @param deparmentId
    */
    publicvoidfilterDepartment(Integer departmentId){
    ViewObject deptVo=this.getDepartments1();
    deptVo.setNamedWhereClauseParam("BindDeptId", departmentId);
    deptVo.executeQuery();
    }

    Code in Managed Bean to call AM method-
    /**
    * Generic Method to call operation binding
    * */
    public BindingContainer getBindingsCont(){
    return BindingContext.getCurrent().getCurrentBindingsEntry();
    }

    /**
    * Generic Method to execute operation Binding
    * */
    public OperationBinding executeOperation(String operation){
    OperationBinding ob = getBindingsCont().getOperationBinding(operation);
    return ob;
    }

    /**PopUp Fetch Listener , will be called on fetch event of PopUp
    * @param popupFetchEvent
    */
    publicvoiddeptPopUpFetchListener(PopupFetchEvent popupFetchEvent){
    OperationBinding ob = executeOperation("filterDepartment");
    //inputTextDeptIdBind is component binding of inputText that is used to get value
    ob.getParamsMap().put("departmentId", inputTextDeptIdBind.getValue());
    ob.execute();
    }

  • Run and check application, put any DepartmentId in inputText and hit open popup button, see popupFetchListener will be called and data will be filtered in popup


Sample ADF Application- Download
Cheere :) Happy Learning 

Allow user input in Jdeveloper for Java applications, Using Java Scanner Class to take input from console

$
0
0
Sometimes we have to take input from Keyboard when we use Scanner or BufferedReader class.
and to take input from Jdeveloper we have to change a setting to allow user input in Jdeveloper.

Let's take an example of java.util.Scanner class-

package client;

importjava.util.Scanner;

publicclassUserInput{
publicUserInput(){
super();
}

publicstaticvoidmain(String[] args){
System.out.println("Please Enter your Name-");
Scanner sc =new Scanner(System.in);
String name = sc.next();
System.out.println("Your Name is "+ name);
}

}


This code requires user to input his name , now to enable user input follow these steps in Jdeveloper IDE
  • Go to “Application” tab and select “Project Properties” in Jdeveloper Menu


  • Go to “Run/Debug profile” and edit default Run Configuration


  • Go to “Tool Setting” and check the box “Allow Program Input” and All Done :)


  • Now run this program and check an additional input box appears on console

Cheers :) Happy Learning

    ADF Basics: Reorder ADF table column using DisplayIndex property

    $
    0
    0
    This post is about a very simple use case that is reordering of af:table column at run time. 
    Ordering of columns in af:table is controlled by DisplayIndex property of af:column
    Check what docs says-

    Default Value: -1

    The display order index of the column. Columns can be re-arranged and they are displayed in the table based on the displayIndex. Columns are sorted based on the displayIndex property, columns without displayIndex are displayed at the end, in the order in which they appear. The displayIndex attribute is honored only for top level columns, since it is not possible to rearrange a child column outside of the parent column.
    Not supported on the following renderkits: org.apache.myfaces.trinidad.core

    We can set DisplayIndex property for all columns in a sequence (1,2,3 etc) that we want to see on page

    Here i am using a HashMap to change DisplayIndex of columns at runtime

    Let's see implementation part-
    • Prepare Model using Departments table of HR Schema and dropped viewObject as table on page 

    •   Page structure window -
    • Next step is - Create a HashMap and it's acceessors in managed bean

    • private HashMap reOrderMap =new HashMap();

      publicvoidsetReOrderMap(HashMap reOrderMap){
      this.reOrderMap= reOrderMap;
      }

      public HashMap getReOrderMap(){
      return reOrderMap;
      }

    • Now we will use this HashMap as part of expression in DisplayIndex property
      See af:table xml source-


    • <af:tablevalue="#{bindings.Departments1.collectionModel}"var="row"
      rows="#{bindings.Departments1.rangeSize}"
      emptyText="#{bindings.Departments1.viewable ? 'No data to display.' : 'Access Denied.'}"
      rowBandingInterval="0"
      selectedRowKeys="#{bindings.Departments1.collectionModel.selectedRow}"
      selectionListener="#{bindings.Departments1.collectionModel.makeCurrent}"
      rowSelection="single"fetchSize="#{bindings.Departments1.rangeSize}"id="t1"
      partialTriggers="::b1 ::b2">
      <af:columnsortProperty="#{bindings.Departments1.hints.DepartmentId.name}"sortable="true"
      headerText="#{bindings.Departments1.hints.DepartmentId.label}"id="c1"
      displayIndex="#{viewScope.ReOrderTableBean.reOrderMap['DepartmentId']}">
      <af:outputTextvalue="#{row.DepartmentId}"
      shortDesc="#{bindings.Departments1.hints.DepartmentId.tooltip}"id="ot1">
      <af:convertNumbergroupingUsed="false"
      pattern="#{bindings.Departments1.hints.DepartmentId.format}"/>
      </af:outputText>
      </af:column>
      <af:columnsortProperty="#{bindings.Departments1.hints.DepartmentName.name}"sortable="true"
      headerText="#{bindings.Departments1.hints.DepartmentName.label}"id="c2"
      displayIndex="#{viewScope.ReOrderTableBean.reOrderMap['DepartmentName']}"
      width="120">
      <af:outputTextvalue="#{row.DepartmentName}"
      shortDesc="#{bindings.Departments1.hints.DepartmentName.tooltip}"id="ot2"/>
      </af:column>
      <af:columnsortProperty="#{bindings.Departments1.hints.ManagerId.name}"sortable="true"
      headerText="#{bindings.Departments1.hints.ManagerId.label}"id="c3"
      displayIndex="#{viewScope.ReOrderTableBean.reOrderMap['ManagerId']}">
      <af:outputTextvalue="#{row.ManagerId}"
      shortDesc="#{bindings.Departments1.hints.ManagerId.tooltip}"id="ot3">
      <af:convertNumbergroupingUsed="false"
      pattern="#{bindings.Departments1.hints.ManagerId.format}"/>
      </af:outputText>
      </af:column>
      <af:columnsortProperty="#{bindings.Departments1.hints.LocationId.name}"sortable="true"
      headerText="#{bindings.Departments1.hints.LocationId.label}"id="c4"
      displayIndex="#{viewScope.ReOrderTableBean.reOrderMap['LocationId']}">
      <af:outputTextvalue="#{row.LocationId}"
      shortDesc="#{bindings.Departments1.hints.LocationId.tooltip}"id="ot4">
      <af:convertNumbergroupingUsed="false"
      pattern="#{bindings.Departments1.hints.LocationId.format}"/>
      </af:outputText>
      </af:column>
      </af:table>

    • Added a button on page to change dispaly index (to set value in HashMap), see managed bean code

    • /**Method to change display order of af:table
      * @param actionEvent
      */
      publicvoidchangeOrderAction(ActionEvent actionEvent){
      reOrderMap.put("DepartmentId",2);
      reOrderMap.put("DepartmentName",4);
      reOrderMap.put("ManagerId",1);
      reOrderMap.put("LocationId",3);

      }

    • Run and check application, by default column ordering is this

    •        On click of Change Order button-

    • Now again to reset columns ordering set DisplaIndex to -1 for all columns

    • /**Method to reset display order of af:table by setting all values to -1
      * @param actionEvent
      */
      publicvoidresetOrderAction(ActionEvent actionEvent){
      reOrderMap.put("DepartmentId",-1);
      reOrderMap.put("DepartmentName",-1);
      reOrderMap.put("ManagerId",-1);
      reOrderMap.put("LocationId",-1);

      }

    Sample ADF Application-Download
    Cheers:) Happy Learning

    Blog Completed 3 awesome years

    $
    0
    0
    I am happy to tell you that my (Ashish Awasthi's Blog) blog has completed 3 years today.
    On 14-October-2012 i have posted my first blog post on ADF Basics: Show inline Message in Oracle ADF and till now blog has more than 180 posts on ADF, Java, JavaScript, jQuery etc.

    I started blogging to help Java & ADF developers, to share what i have learnt and still trying to do same
    Initially started this blog with blogspot.com - oracleadf-java.blogspot.com& after one year changed it to a custom domain www.awasthiashish.com

    It has 1700+ fan following on facebook -Facebook Page
    Now i am trying to put some more interesting stuff to learn, Keep an eye on blog

    Taking as a whole it was awesome journey of 3 years :) Thanks for your support , Keep reading Keep Learning :)

    Now say Happy B'day to Ashish Awasthi's Blog  :)


    Get domain information (WHOIS) using Apache Commons Net API- ADF & Java

    $
    0
    0
    We can get any domain information using Apache commons net library. It supports various protocols and WHOIS information is one of them

    WhoisClient class provides access of domain information
    See what docs says -

    The WhoisClient class implements the client side of the Internet Whois Protocol defined in RFC 954. To query a host you create a WhoisClient instance, connect to the host, query the host, and finally disconnect from the host. If the whois service you want to query is on a non-standard port, connect to the host at that port.

    Download required library or if this link doesn't work then goto API page and download from there

    This simple java method will fetch information of domain using Apache library


    importorg.apache.commons.net.whois.WhoisClient;

    /**Method to get domain WhoIs information using Apache Commons Net API
    * @param domainName
    * @return
    */
    public String getWhoisDomainInformation(String domainName){
    StringBuilder info =new StringBuilder("");
    WhoisClient whois =new WhoisClient();
    try{
    whois.connect(WhoisClient.DEFAULT_HOST);
    String data = whois.query("="+ domainName);
    info.append(data);
    whois.disconnect();

    }catch(SocketException e){
    e.printStackTrace();
    }catch(IOException e){
    e.printStackTrace();
    }
    return info.toString();
    }

    • Now created an ADF Application and a page in viewController project
    • Added library (commons-net jar file) in viewController project


    • Here i am using one button and two input text, first one to enter domain name and second one is to show fetched WHOIS information

    • On button click i have called above method and passed domain name (To get domain name use component binding of inputText) and to show fetched information a String variable is mapped with second inputText

    • See Managed Bean code and Page XML Source (How it is mapped) -

      //String to store domain information and to show on page in second inputText
      private String domainInfoDet;
      //First Input Text component binding to get domain name in managed bean
      private RichInputText domainNameBind;

      publicvoidsetDomainInfoDet(String domainInfoDet){
      this.domainInfoDet= domainInfoDet;
      }

      public String getDomainInfoDet(){
      return domainInfoDet;
      }

      publicvoidsetDomainNameBind(RichInputText domainNameBind){
      this.domainNameBind= domainNameBind;
      }

      public RichInputText getDomainNameBind(){
      return domainNameBind;
      }

      /**Action Listener to execute method on button click
      * @param actionEvent
      */
      publicvoidgetDomainInfoAction(ActionEvent actionEvent){
      //domainNameBind is component binding of first inputText
      if(domainNameBind.getValue()!=null){
      String domainName =(String) domainNameBind.getValue();
      //Set WHOIS info in string to show on page (Second InputText)
      domainInfoDet = getWhoisDomainInformation(domainName);
      }
      }


      XML Source of Page-

      <af:formid="f1">
      <af:panelBoxtext="Domain Information"id="pb1"showDisclosure="false">
      <f:facetname="toolbar"/>
      <af:panelGroupLayoutid="pgl1"layout="vertical"halign="center">
      <af:panelGroupLayoutid="pgl2"layout="horizontal">
      <af:inputTextlabel="Domain Name"id="it1"
      contentStyle="width:250px;padding:10px;color:red;font-weight:bold;font-size:medium;"
      labelStyle="font-weight:bold;color:black;"
      binding="#{viewScope.DomainInformationBean.domainNameBind}"
      autoSubmit="true"/>
      <af:buttontext="Get Information"id="b1"inlineStyle="font-weight:bold;"
      actionListener="#{viewScope.DomainInformationBean.getDomainInfoAction}"/>
      </af:panelGroupLayout>
      <af:inputTextlabel="Label 1"id="it2"
      contentStyle="width:600px;color:#405d9a;font-weight:bold;"simple="true"rows="40"
      value="#{viewScope.DomainInformationBean.domainInfoDet}"partialTriggers="b1"
      clientComponent="true"/>
      </af:panelGroupLayout>
      </af:panelBox>
      </af:form>


    • All Done :) , Run and check application

    Sample ADF Application - Download
    Cheers:) Happy Learning

      Oracle JDeveloper and Oracle ADF 12c (12.2.1.0.0) out (bug fixed and lots of new features introduced)

      $
      0
      0
      Time to check new Jdeveloper 12.2.1 , Wait is over Checkout new features :)
      Download- Oracle JDeveloper 12g (12.2.1.0.0)

      1. Alta UI is now default skin for all ADF Faces components , previously it was Skyros
      Read more about Oracle Alta UI Design Patterns

      4. In Data Visualization some change done in Pie Chart and Thematic Map. New component NBox and funnel chart is introduced

      2. Theme Editor is now available to design new skins or to edit existing themes , User doesn't need to learn CSS to use theme editor

      3. Masonry Layout is introduced to design responsive applications, it is like responsive HTML5 websites that adjusts component according to available space and this feature is essential for web applications now days
      A responsive 3 column layout template is also introduced for viewing in Desktop , Mobile and Tablet


      Read more about new features - New In This Release

      Bug Fixed List in Jdeveloper 12.2.1.0.0-

      Many bugs related to PopUp, AutoSuggest, Validation Misbehavior , table pagination , IDE Freezing are fixed in this release
      See complete listing of fixed bugs- Bug Fix List

      Overall it is going to be a good experience :)
      Cheers :) Happy Learning

      Read data from Google Spreadsheet without authentication using Java

      $
      0
      0
      Google Spreadsheets provides a way to create, edit, save spreadsheets online.
      The Google Sheets API (formerly called the Google Spreadsheets API) lets you develop client applications that read and modify worksheets and data in Google Sheets.
      Read More about Sheets API

      Let's see how to use this API to read data from Spreadsheet, here i am going to use Spreadsheet version 3.0 , if this link doesn't work then check on GitHub , from here you will get  client library for all Google APIs

      Extract downloaded zip file in your directory and go to lib folder your_directory...\gdata-samples.java-1.47.1\gdata\java\lib, from there copy Gdata-core-10.jar, Gdata-spreadsheet-30.jar, Google-collect-10-rc1.jar to your project path and add all jar files to project class path

      Next Step is create and configure Google Sheet -


      First step is to log in  your google account and access Google Sheets


      You will see some predefined templates to create new sheet or you can create a blank sheet (Just click on Blank option)


      A new sheet opens , provide title and column name (as many as you want) and put some data in cells of each columns


      Next step is to publish this spreadsheets, click on File menu and select Publish to web option

       Publish with default settings  (Entire document as WebPage)

       After publishing just copy URL to access published spreadsheet


      But we can't use this URL in our java code so change it to a different URL. Copy spreadsheet key from above URL
      https://docs.google.com/spreadsheets/d/1G3VABou70MUbRzY4vHgiDME5JW5rfo7lrAr_hZyEawU/pubhtml
      and use in this https://spreadsheets.google.com/feeds/list/SPREADSHEET_KEY/default/public/values 

      After changes final URL to access spreadsheet feeds looks like this - https://spreadsheets.google.com/feeds/list/1G3VABou70MUbRzY4vHgiDME5JW5rfo7lrAr_hZyEawU/default/public/values

      Now see the code to read data (All required jars are mentioned above, add all to project class path)


      importjava.io.IOException;

      importjava.net.URL;

      importcom.google.gdata.client.spreadsheet.SpreadsheetService;
      importcom.google.gdata.data.spreadsheet.CustomElementCollection;
      importcom.google.gdata.data.spreadsheet.ListEntry;
      importcom.google.gdata.data.spreadsheet.ListFeed;
      importcom.google.gdata.util.ServiceException;

      publicclassPrintSpreadsheet{
      publicstaticvoidmain(String[] args){
      SpreadsheetService service =new SpreadsheetService("Sheet1");
      try{
      String sheetUrl =
      "https://spreadsheets.google.com/feeds/list/1G3VABou70MUbRzY4vHgiDME5JW5rfo7lrAr_hZyEawU/default/public/values";

      // Use this String as url
      URL url =new URL(sheetUrl);

      // Get Feed of Spreadsheet url
      ListFeed lf = service.getFeed(url, ListFeed.class);

      //Iterate over feed to get cell value
      for(ListEntry le : lf.getEntries()){
      CustomElementCollection cec = le.getCustomElements();
      //Pass column name to access it's cell values
      String val = cec.getValue("Cell1");
      System.out.println(val);
      String val2 = cec.getValue("Cell2");
      System.out.println(val2);
      }
      }catch(IOException e){
      e.printStackTrace();
      }catch(ServiceException e){
      e.printStackTrace();
      }
      }
      }


      And output is -
      Cheers :) Happy Learning

      ADF Basics: Using f:attribute to pass parameter in ActionEvent

      $
      0
      0
      f:attribute tag (JSF Tag supported in ADF Faces) is used to pass some additional attribute value to associated component
      Sometimes using f:attribute simplify a complex piece of code, this tag has very simple structure. It has two properties

      name- Name of tag attribute
      value- Value or an EL reference of value

      Here in this post we will see how to use this tag with ADF Faces, I am using Departments table of HR Schema and requirement is to delete departments with attribute DepartmentId  greater than 100


      So i have added a link in af:table to delete selected department
      Now on this delete link action i have to check that DepartmentId for selected row should be greater than 100 and there are multiple way to do this

      1. Get current row of iterator and get DepartmentId from that row
      2. Get selected row using getSelectedRowKeys


      But here i am using f:attribute to get selected DepartmentId, See how to do this :)


      Add f:attribute tag under af:link like this, here i have assigned #{row.DepartmentId} as value reference of f:attribute tag, this will store selected departmentId in attribute


      <af:columnid="c5">
      <af:linktext="Delete"id="l1"
      actionListener="#{viewScope.FAttributeDemoBean.deleteDepartmentAction}">
      <f:attributename="DepartmentId"value="#{row.DepartmentId}"/>
      </af:link>
      </af:column>

      Now see how to get f:attribute value in managed bean and perform delete operation on that basis


      importjavax.faces.application.FacesMessage;
      importjavax.faces.context.FacesContext;
      importjavax.faces.event.ActionEvent;

      importoracle.adf.model.BindingContext;

      importoracle.binding.BindingContainer;
      importoracle.binding.OperationBinding;


      /**Get BindingContainer of current view port**/
      public BindingContainer getBindingsCont(){
      return BindingContext.getCurrent().getCurrentBindingsEntry();
      }

      /**
      * Generic Method to execute operation Binding
      * */
      public OperationBinding executeOperation(String operation){
      OperationBinding createParam = getBindingsCont().getOperationBinding(operation);
      return createParam;

      }

      /**Method to delete Department row on condition basis
      * @param actionEvent
      */
      publicvoiddeleteDepartmentAction(ActionEvent actionEvent){
      //Get attribute value using it's name
      Object obj = actionEvent.getComponent().getAttributes().get("DepartmentId");
      if(obj !=null&&((Integer) obj)>100){
      // If department id is greater than 100 then call delete operation on it
      executeOperation("Delete").execute();
      executeOperation("Execute").execute();
      }else{
      FacesMessage errMsg =new FacesMessage("Department Id for selected Department is not greater than 100");
      errMsg.setSeverity(FacesMessage.SEVERITY_ERROR);
      FacesContext.getCurrentInstance().addMessage(null, errMsg);
      }
      }

      All done :D , Run application and check (tried deleting Department with DepartmentId 100)


      Sample ADF Application (Jdeveloper 12.2.1) -Download
      Cheers :) Happy Learning

      New look of dvt:funnelChart for Data Visualization in Jdeveloper 12.2.1.0

      $
      0
      0
      A couple of weeks ago Oracle Jdeveloper and ADF team released new version of Jdevloper 12.2.1 with many cool features
      New funnel chart (<dvt:funnelChart>) is introduced instead of funnel graph (<dvt:funnelGraph>)
      Old funnel graph looks like this-


      Funnel chart is used to show visual distribution of different steps of any cycle
      What docs says-

      A chart representing data related to steps in a process. The steps appear as vertical slices across a cone-shaped section which represent stages of a procees or target and actual values, showing levels by color.

      Here we see how to use this new component to design a better UI, For this I have created a viewObject using this sql


      SELECT A.DEPARTMENT_NAME, 
      B.FIRST_NAME ||''|| B.LAST_NAME AS EMPLOYEE_NAME,
      B.SALARY,
      100000AS TARGET
      FROM DEPARTMENTS A, EMPLOYEES B
      WHERE A.DEPARTMENT_ID=B.DEPARTMENT_ID;

      Then go to datacontrol and drop this viewObject on page as chart

      In dialog select Funnel on left panel and you can select horizontal or vertical layout of funnel at right side


      This is the configuration screen for Funnel. Here we can select Actual and Target values and Section Name appears on view port


      Click on ok button of this dialog and your Funnel chart is ready
      See generated XML-


      <dvt:funnelChartid="funnelChart2"var="row"value="#{bindings.DeptEmpView11.collectionModel}">
      <dvt:funnelDataItemid="di2"targetValue="#{row.Target}"label="#{row.DepartmentName}"
      value="#{row.Salary}"/>
      </dvt:funnelChart>

      Now run this application and see how it appears :)


      Wow.. it's good :)
      If we want to show only Departments Name with salary (No comparison with Target) then just remove this targetValue from xml code and then it looks like this


      There are lots of properties to change it's layout , 3D effect , Title , FootNote etc. Try each one and see how it affects Funnel

      Cheers :) Happy Learning

      Responsive UI with new Masonry Layout in ADF 12.2.1.0

      $
      0
      0

      What is Responsive UI and Why it is Important-

      User interface or view of website or web application changes as the screen size of device changes
      This type of UI is called Responsive and it is important to design responsive UI for your application because each device have different screen dimension and you can not restrict user to use any specific device to view your application . This is very basic requirement of web development that UI should look good on Mobile, PC, Tablet or any other device


      ADF 12.2.1.0 comes with many new features, components and layouts
      Masonry Layout (af:masonryLayout) is introduced to design responsive UI and believe it is very simple to use

      It works like tile controller and arranges tiles of different dimensions to fit in browser maximum width.


      That's why it is called Masonry . 

      I have created a simple page that have 4 types of chart, 1 listView and 1 table and it looks like this


      To use Masonry Layout - Put all components inside this layout and use built in Style Classes (AFMasonryTileSize1x1, AFMasonryTileSize2x2 etc) defined in framework for Masonry layout


      Set StyleClass property of each child of masonry layout. Here tileStyle is a class defined in ADF Skin file to change look of tiles (Not necessary if you don't want to change style of tiles)


      .tileStyle {
      border:1pxsoliddarkgreen;
      background-color:#e7e7e7;
      }

      All Done :) Now check how it works
      I have resized my browser window and you can see tiles are arranged according to maximum screen width


      Again i resized browser screen and see how it looks :) Now time to develop responsive ADF application with power of Alta UI


      Cheers :) Happy Learning

      New look of dvt:pieChart as donut chart for Data Visualization in Jdeveloper 12.2.1.0

      $
      0
      0

      Oracle Jdeveloper 12C (12.2.1.0) documentation tells about a new enhancement in look of pie chart

      We can now design donut chart using dvt:pieChart , innerRadius property allows us to create donut chart look on the base of default pie chart.
      Donut chart is nothing just a variation of pie chart that show data in sections of a circle, I believe everyone knows how to design a pie chart in ADF Faces
      I have dropped a viewObject (it has Department wise Salary detail) as pie chart on page


      <dvt:pieChartid="pieChart2"var="row"value="#{bindings.DeptEmpView16.collectionModel}"inlineStyle="width:500px;">
      <dvt:chartLegendid="cl4"/>
      <dvt:pieDataItemid="di5"label="#{row.DepartmentName}"value="#{row.Salary}"/>
      </dvt:pieChart>

      and default pie chart looks like this


      Now to change it's look to donut chart , just change in some properties
      InnerRadius  property creates donut look , SliceGaps  is the gap between slices and CenterLabel  is the text shown in center of donut chart

      XML Source-

      <dvt:pieChartid="pieChart2"var="row"value="#{bindings.DeptEmpView16.collectionModel}"inlineStyle="width:500px;"
      innerRadius="0.5"sliceGaps="1"centerLabel="Department Salay Chart"
      centerLabelStyle="font-weight:bold;">
      <dvt:chartLegendid="cl4"/>
      <dvt:pieDataItemid="di5"label="#{row.DepartmentName}"value="#{row.Salary}"/>
      </dvt:pieChart>

      After these changes final chart looks like this and woww this is great :)

       Cheers :) Happy Learning

      Responsive UI with new af:matchMediaBehavior in ADF 12.2.1.0

      $
      0
      0

      Jdeveloper and ADF 12.2.1 comes with many new features ( see these posts-
      New look of dvt:funnelChart for Data Visualization in Jdeveloper 12.2.1.0
      New look of dvt:pieChart as donut chart for Data Visualization in Jdeveloper 12.2.1.0  )
      and supports responsive UI design.
      Masonry Layout and MatchMediaBehaivor tag is introduced to support responsive UI design

      af:matchMediaBehavior allows developer to control properties of components according to screen size. It uses CSS media queries to detect screen size and changes value of specified property of component

      This tag has 3 properties

      PropertyName- component property that you want to change
      MatchedPropertyValue- value for that property
      MediaQuery- to detect screen height, width, resolution etc

      I have a table and form (2 rows layout) in my page surrounded by a horizontal panel group layout
      It looks like this


      Added two media tags in this structure


      First one for panel group layout - if screen width is less than 700px then it's layout should be changed to vertical


      <af:matchMediaBehaviormatchedPropertyValue="vertical"mediaQuery="screen and (max-width: 700px)"
      propertyName="layout"/>


      Second for panel form layout- if screen width is less than 900px then no. of rows should be changed to 4, means all input text will be in single column


      <af:matchMediaBehaviormatchedPropertyValue="4"mediaQuery="screen and (max-width: 900px)"
      propertyName="rows"/>

      On running this application when i resized browser window and you can see all input components are arranged in single column as there is no more space (Second media behavior )


      again resized browser window to be more narrow and panel group layout is vertical now (First media behavior)

      Cheers :) Happy Learning

      Checkbox ValueChangeListener problem in af:table - ADF 12.1.3

      $
      0
      0

      Recently i faced a problem while working on one of my application, it has an editable table having one check box column and a valueChangeListener is defined on that check box.

      Problem is that whenever user selects any row of table , valueChangeListener of check box is called every time for all editable rows, this is weird because VCL should execute only when user selects or deselects check box
      Here i am showing same problem , i have used Department table of HR Schema to create business components and dropped Department viewObject as table on page, added a transient attribute to use as check box

       See af:table XML source on page-


      <af:tablevalue="#{bindings.Departments1.collectionModel}"var="row"
      rows="#{bindings.Departments1.rangeSize}"
      emptyText="#{bindings.Departments1.viewable ? 'No data to display.' : 'Access Denied.'}"
      rowBandingInterval="0"selectedRowKeys="#{bindings.Departments1.collectionModel.selectedRow}"
      selectionListener="#{bindings.Departments1.collectionModel.makeCurrent}"rowSelection="single"
      fetchSize="#{bindings.Departments1.rangeSize}"
      filterModel="#{bindings.Departments1Query.queryDescriptor}"
      queryListener="#{bindings.Departments1Query.processQuery}"filterVisible="true"varStatus="vs"
      id="t1">
      <af:columnsortProperty="#{bindings.Departments1.hints.DepartmentId.name}"filterable="true"
      sortable="true"headerText="#{bindings.Departments1.hints.DepartmentId.label}"id="c1">
      <af:outputTextvalue="#{row.DepartmentId}"
      shortDesc="#{bindings.Departments1.hints.DepartmentId.tooltip}"id="ot1">
      <af:convertNumbergroupingUsed="false"
      pattern="#{bindings.Departments1.hints.DepartmentId.format}"/>
      </af:outputText>
      </af:column>
      <af:columnsortProperty="#{bindings.Departments1.hints.DepartmentName.name}"filterable="true"
      sortable="true"headerText="#{bindings.Departments1.hints.DepartmentName.label}"id="c2">
      <af:outputTextvalue="#{row.DepartmentName}"
      shortDesc="#{bindings.Departments1.hints.DepartmentName.tooltip}"id="ot2"/>
      </af:column>
      <af:columnsortProperty="#{bindings.Departments1.hints.ManagerId.name}"filterable="true"
      sortable="true"headerText="#{bindings.Departments1.hints.ManagerId.label}"id="c3">
      <af:outputTextvalue="#{row.ManagerId}"
      shortDesc="#{bindings.Departments1.hints.ManagerId.tooltip}"id="ot3">
      <af:convertNumbergroupingUsed="false"
      pattern="#{bindings.Departments1.hints.ManagerId.format}"/>
      </af:outputText>
      </af:column>
      <af:columnsortProperty="#{bindings.Departments1.hints.LocationId.name}"filterable="true"
      sortable="true"headerText="#{bindings.Departments1.hints.LocationId.label}"id="c4">
      <af:outputTextvalue="#{row.LocationId}"
      shortDesc="#{bindings.Departments1.hints.LocationId.tooltip}"id="ot4">
      <af:convertNumbergroupingUsed="false"
      pattern="#{bindings.Departments1.hints.LocationId.format}"/>
      </af:outputText>
      </af:column>
      <af:columnheaderText="#{bindings.Departments1.hints.selectCheckBxTrans.label}"id="c5">
      <af:selectBooleanCheckboxvalue="#{row.bindings.selectCheckBxTrans.inputValue}"
      label="#{row.bindings.selectCheckBxTrans.label}"
      shortDesc="#{bindings.Departments1.hints.selectCheckBxTrans.tooltip}"
      id="sbc1"autoSubmit="true"
      valueChangeListener="#{pageFlowScope.CheckBoxBean.checkBoxVCE}"/>
      </af:column>

      </af:table>

      and it's pageDef file looks like this -


      <bindings>
      <treeIterBinding="Departments1Iterator"id="Departments1">
      <nodeDefinitionDefName="checkbox.model.view.DepartmentsVO"Name="Departments10">
      <AttrNames>
      <ItemValue="DepartmentId"/>
      <ItemValue="DepartmentName"/>
      <ItemValue="ManagerId"/>
      <ItemValue="LocationId"/>
      <ItemValue="selectCheckBxTrans"/>
      </AttrNames>
      </nodeDefinition>
      </tree>
      <buttonIterBinding="Departments1Iterator"id="selectCheckBxTrans"DTSupportsMRU="false"StaticList="true">
      <AttrNames>
      <ItemValue="selectCheckBxTrans"/>
      </AttrNames>
      <ValueList>
      <ItemValue="Y"/>
      <ItemValue="N"/>
      </ValueList>
      </button>
      </bindings>

      So this is the whole case that creates this problem, I have tried setting changeEventPolicy of iterator to none but no luck
      Actual problem was that attribute binding for selectCheckBxTrans is present but doesn't bind  table check boxso just changed pageDef code and added this reference in check box item value

      <ItemValue="selectCheckBxTrans"Binds="selectCheckBxTrans"/>

      and everything is working properly now :)
      By default when we drop attribute as checkbox Binds property is there in pageDef still if anyone face this type of behavior then double check pageDef file

      Sample ADF Application that reproduce this problem - Download
      Cheers:) Happy Learning

      Scroll to particular component using af:scrollComponentIntoViewBehavior tag in ADF Faces

      $
      0
      0

      You all must have seen HTML Anchor links, this is actually called link within page and used to navigate between page sections
      Same as HTML anchor tag ADF Faces has <af:scrollComponentIntoViewBehavior> tag that allows user to jump to a particular component on page

      See what docs says-
      The scrollComponentIntoViewBehavior tag is a declarative way to have a command component (e.g. a button) scroll a component into view and optionally set focus in it. This tag will be ignored for any server-rendered components, as it is only supported for the rich client.
      The scrollComponentIntoViewBehavior tag cancels server-side event delivery automatically - so actionListener or action attributes on the parent component will be ignored. This cannot be disabled. Developers that need to also trigger server-side functionality can add an additional client listener that uses AdfCustomEvent and af:serverListener to deliver a server-side event. 

      So in this post i am using 5 images and 5 buttons to navigate to each image, set clientComponent property of all af:image to true because this tag is supported only by client rendered components.

      Dropped scrollComponentIntoViewBehavior under all buttons and provided id of respective af:image component
      See XML source of page -


      <af:panelStretchLayoutid="psl1"topHeight="25px"bottomHeight="25px"dimensionsFrom="parent">
      <f:facetname="bottom">
      <af:panelGroupLayoutid="pgl3"layout="horizontal">
      <af:buttontext="Paragliding"id="b4">
      <af:scrollComponentIntoViewBehaviorcomponentId="i1"/>
      </af:button>
      <af:buttontext="Rope Way"id="b5">
      <af:scrollComponentIntoViewBehaviorcomponentId="i5"/>
      </af:button>
      </af:panelGroupLayout>
      </f:facet>
      <f:facetname="center">
      <af:panelGroupLayoutid="pgl1"layout="scroll">
      <af:imagesource="#{resource['images:1.jpg']}"id="i1"
      inlineStyle="width:700px;height:400px;"shortDesc="Paragliding"
      clientComponent="true"/>
      <af:imagesource="#{resource['images:3.jpg']}"shortDesc="Rope Way"id="i5"
      inlineStyle="width:700px;height:400px;"clientComponent="true"/>
      <af:imagesource="#{resource['images:2.jpg']}"id="i2"
      inlineStyle="width:700px;height:400px;"shortDesc="Green Ground"
      clientComponent="true"/>
      <af:imagesource="#{resource['images:8.jpg']}"id="i3"
      inlineStyle="width:700px;height:400px;"shortDesc="Beautiful Cottage"
      clientComponent="true"/>
      <af:imagesource="#{resource['images:9.jpg']}"id="i4"
      inlineStyle="width:700px;height:400px;"shortDesc="Sheeps"
      clientComponent="true"/>
      </af:panelGroupLayout>
      </f:facet>
      <f:facetname="start"/>
      <f:facetname="end"/>
      <f:facetname="top">
      <af:panelGroupLayoutid="pgl2"layout="horizontal">
      <af:buttontext="Green Ground"id="b1">
      <af:scrollComponentIntoViewBehaviorcomponentId="i2"/>
      </af:button>
      <af:buttontext="Beautiful Cottage"id="b2">
      <af:scrollComponentIntoViewBehaviorcomponentId="i3"/>
      </af:button>
      <af:buttontext="Sheeps"id="b3">
      <af:scrollComponentIntoViewBehaviorcomponentId="i4"/>
      </af:button>
      </af:panelGroupLayout>
      </f:facet>
      </af:panelStretchLayout>

      Page looks like this -

      All done, now just click on buttons to navigate among images. here i am attaching sample ADF application for reference - Download

      Cheers:) Happy Learning

      Create SOAP Web Service with Application Module quickly in ADF 12.2.1

      $
      0
      0

      SOAP stands for Simple Object Access Protocol, a protocol to exchange information in XML format between two applications over HTTP. This protocol is used to create ,access and consume web services.

      SOA (Service Oriented Architecture) focuses on re-usability and exposing application module as web service makes it's methods and objects accessible from any device , any platform and these methods and objects can be further used by any other application

      In ADF 12.2.1 we can create a SOAP web service within seconds , See how to configure Application Module to expose it's methods and objects to service interface
      • Created a Fusion Web Application using Departments and Employees table of HR Schema


      • Open Application Module and Web Service tab, there is a separate tab for SOAP , click on green plus icon


      • In Step 1 we can set Web Service Name and Target Namespace, Also enable option to generate asynchronous methods, by default it supports synchronous service methods .
        Read in detail check this - Creating SOAP Web Services with Application Modules


      • In Step 2 we can expose some built in methods and in Step 3 if we have any custom methods defined in Application Module then we can expose these methods to service interface.
        Here i have created a simple method in AMImpl to get department name from it's id and exposed this method in service


      • /**Method to get Department Name from Department Id
        * @param deptId
        * @return
        */
        public String getDeptName(Integer deptId){
        String deptName ="Department not found";
        ViewObject deptVo =this.getDepartments1();
        Row[] filteredRows = deptVo.getFilteredRows("DepartmentId", deptId);
        if(filteredRows.length>0){
        deptName = filteredRows[0].getAttribute("DepartmentName").toString();
        }
        return deptName;
        }


      • In Step 4 select viewObject that we want to expose and their methods , i have selected both Departments and Employees viewObject and enabled operation for both
        For Departments ViewObject -

      •  For Employee ViewObject-


      • Click on Finish to create service interface and all required files 


      • Now to run and check web service , Expand Application Module root and there is a  service implementation java class SoapWebServServiceImpl.java  , Right click on this and choose Run


      • On running you'll see an URL in weblogic log tab, click on that url it will open HTTP Analyzer tool and there you'll see list of all operation , here i have selected GetByKey operation of Departments viewObject

      •           Here i passed depatmentId as key parameter and you can see web service response

      • Again i selected create operation for Departments viewObject and provided all parameters and click Send Request button


      •                   and result in database table


      • This time i am checking custom method defined in application module to get Department Name


      All Done :) Sample ADF Application-Download

      Cheers :) Happy Learning

      Create REST Web Service with Application Module declaratively in ADF 12.2.1

      $
      0
      0
      REST stands for Representational State Transfer, REST is an architectural style not a protocol as SOAP that's why it can use any other protocol like SOAP, HTTP etc.
      REST requires less bandwidth and resources (lighter) than SOAP

      New ADF 12.2.1 supports creating RESTful web services directly from Application Module, In previous versions we have to do everything manually
      See- Create RESTful services on top of ADF Business Components


      But in new release Oracle mentioned this -

      ADF Business Components now offers the ability for users to declaratively expose their data model as RESTful web services. Users can decide on the set of attributes to expose from backing view object instances, the actions to make available, and the view link relationships to preserve for the resulting resource.

      • Created a Fusion Web Application using Departments table of HR Schema

      • Open Application Module and click on Web Service tab, there is a separate tab for REST, Click on green plus icon- It show an error dialog that asks to define a version


      • We have to define release version and name in adf-config.xml to create REST Web Service


      • Again go back to Application Module and click on green plus icon of REST tab, a dialog appears to create REST Resource - Provide resource name and select release version


      • On click of OK and IDE generates a separate project for REST Web Service and a REST Resource file under Application Module to configure custom methods , viewObjects and attributes etc.


        REST Resource file -
      • Now to run and check web service ,Right click on RESTWebService project and choose Run


      • On running you'll see an URL in weblogic log tab, click on that url, it will open HTTP Analyzer tool


      • Now to access REST Resource we have to add version name and Resource Name in above url like this- http://127.0.0.1:7101/RestWebServApp-RESTWebService-context-root/rest/Jdev12.2.1/Department , select GET in method and  click on Send Request button and you can check response in right panel

      • We can also pass Department Id as parameter in url to get specific department detail

      Cheers :) Happy Learning

        Get selected slice of dvt:pieChart using custom selection listener in ADF

        $
        0
        0
        First of all wishing a very Happy New Year to all of you, New Year is like a blank page , fill it with happiness and good memories


        This post is about a simple requirement - How to get selected slice value of dvt:pieChart ?
        So for this we have to create a custom selection Listener in managed bean that will be called whenever user selects any slice of pieChart
        If you see documentation of pieChart it tells about two properties -

        Selection of data items can be enabled using the dataSelection attribute. Selection can be processed using selectionListener on the server or the selection event type on the client.

        dataSelectionStringYesValid Values: none, single, multiple
        Default Value: none

        Specifies the data selection mode for the chart. Valid values are "none" (Default), "single", and "multiple". If selection is "multiple", marquee selection will be enabled for non-pie charts.

        See the steps to implement selection listner -


        • Create a Fusion Web Application using Employees table of HR Schema

        • Create a page and drop Employees viewObject as pieChart on page


        • Select pieChart in structure window and in property inspector set DataSelection property to single and create a Selection Listener in managed bean


        • Copy value property of pieChart, it'll be like this- #{bindings.Employees1.collectionModel} Now see code in selection listener that sets selected row as current row and then from iterator we can get current row and from that row we can get all attributes


        • importjavax.el.ELContext;

          importjavax.el.ExpressionFactory;

          importjavax.el.MethodExpression;
          importjavax.el.ValueExpression;

          importjavax.faces.context.FacesContext;


          importoracle.jbo.Row;

          importorg.apache.myfaces.trinidad.event.SelectionEvent;

          publicclassPieChartSelectionBean{
          publicPieChartSelectionBean(){
          }

          /**
          * Programmatic invocation of a method that an EL evaluates to.
          *
          * @param el EL of the method to invoke
          * @param paramTypes Array of Class defining the types of the parameters
          * @param params Array of Object defining the values of the parametrs
          * @return Object that the method returns
          */
          publicstatic Object invokeEL(String el, Class[] paramTypes, Object[] params){
          FacesContext facesContext = FacesContext.getCurrentInstance();
          ELContext elContext = facesContext.getELContext();
          ExpressionFactory expressionFactory = facesContext.getApplication().getExpressionFactory();
          MethodExpression exp = expressionFactory.createMethodExpression(elContext, el, Object.class, paramTypes);

          return exp.invoke(elContext, params);
          }

          /**
          * Programmatic evaluation of EL.
          *
          * @param el EL to evaluate
          * @return Result of the evaluation
          */
          publicstatic Object evaluateEL(String el){
          FacesContext facesContext = FacesContext.getCurrentInstance();
          ELContext elContext = facesContext.getELContext();
          ExpressionFactory expressionFactory = facesContext.getApplication().getExpressionFactory();
          ValueExpression exp = expressionFactory.createValueExpression(elContext, el, Object.class);

          return exp.getValue(elContext);
          }

          /**Custom Selection Listener for dvt:pieChart
          * @param selectionEvent
          */
          publicvoidpieChartSelectionListener(SelectionEvent selectionEvent){
          // Makes selected slice as current row
          invokeEL("#{bindings.Employees1.collectionModel.makeCurrent}",new Class[]{ SelectionEvent.class},new Object[]{
          selectionEvent });
          // Get the selected row (Use pie chart iterator name)
          Row selectedRow =(Row) evaluateEL("#{bindings.Employees1Iterator.currentRow}");// get the current selected row
          // Get any attribute from selected row
          System.out.println("Selected Employee is-"+ selectedRow.getAttribute("FirstName"));

          }


          }


        • Run and check application, pie looks like this

          Select any slice-
          It's Employee name appears on log


        All Done :) Sample ADF Application- Download
        Cheers :) Happy Learning

        Consuming a SOAP Web Service quickly using Web Service Data Control (WSDL) in ADF

        $
        0
        0
        Creating and Consuming Web Servie is an important part development cycle . In earlier posts i have described about creating SOAP/REST Web Service
        Create REST Web Service with Application Module declaratively in ADF 12.2.1
        Create SOAP Web Service with Application Module quickly in ADF 12.2.1

        Now this post is about consuming a SOAP Web Service. A very simple way to consume Web Service is to create Web Service Data Control (WSDL) for external Web Service URL
        Here i am using a Country-Currency Web Service (http://www.webservicex.net/country.asmx) to create WSDL


        • Create a Fusion Web Application with default Model and ViewController project

        • Right click on Model project , Select New--> From Gallery--> Business Tier--> Web Services and select Web Service Data Control SOAP/REST 

        • It opens WSDL creation wizard , First Step is to provide Web Service Name and URL


        • Click on next and in second screen select the methods to expose in Data Control that will be further used by application


        • In third step we can set return type of Web Service response , there are two options -XML and CSV. Leave it as default XML


        • Click on Finish button to generate DataControl.dcx (It is created when DataControl is registered on Business Service not on ADF Business Components) and WSDL document


        • Creation of WSDL is done now create a page in view controller project and expand DataControls menu , there we will see a data control created for CountryWebServices 


        • Drag and drop GetCountries operation on page as a button and expand this operation and drop String as output text formatted to show response of webservice


        • In same manner drop another method as parameter form as it has one input parameter that takes country name as input and shows it's currency as output.
          See page source code-


        • <af:panelGroupLayoutid="pgl1"layout="horizontal"valign="top">
          <af:panelFormLayoutid="pfl2"inlineStyle="width:600px;">
          <af:buttonactionListener="#{bindings.GetCountries.execute}"text="GetCountries"
          disabled="#{!bindings.GetCountries.enabled}"id="b1"/>
          <af:outputFormattedvalue="#{bindings.Return.inputValue}"id="of2"
          partialTriggers="b1"inlineStyle="width:500px;color:blue;"/>
          </af:panelFormLayout>
          <af:panelFormLayoutid="pfl1"inlineStyle="width:600px;">
          <af:inputTextvalue="#{bindings.CountryName.inputValue}"
          label="#{bindings.CountryName.hints.label}"
          required="#{bindings.CountryName.hints.mandatory}"
          columns="#{bindings.CountryName.hints.displayWidth}"
          maximumLength="#{bindings.CountryName.hints.precision}"
          shortDesc="#{bindings.CountryName.hints.tooltip}"id="it1">
          <f:validatorbinding="#{bindings.CountryName.validator}"/>
          </af:inputText>
          <af:buttonactionListener="#{bindings.GetCurrencyByCountry.execute}"
          text="GetCurrencyByCountry"
          disabled="#{!bindings.GetCurrencyByCountry.enabled}"id="b2"/>
          <af:outputFormattedvalue="#{bindings.Return1.inputValue}"id="of1"
          partialTriggers="b2"inlineStyle="color:maroon;"/>
          </af:panelFormLayout>
          </af:panelGroupLayout>

        • Now run and check application


        All done :) Sample ADF Application- Download
        Cheers :) Happy Learning
        Viewing all 165 articles
        Browse latest View live